

Scrap Glass Project

Our tutorial for this scrap project first appeared as an article in the Summer 2010 issue of Glass Craftsman.
One of the great things about kilnforming is that glass scraps never end up in the trash.
Unlike stained glass, where each new project produces a lot of small bits only a mosaic artist could love, fused glass allows us to take the trimmings from one project and melt them together into new work.
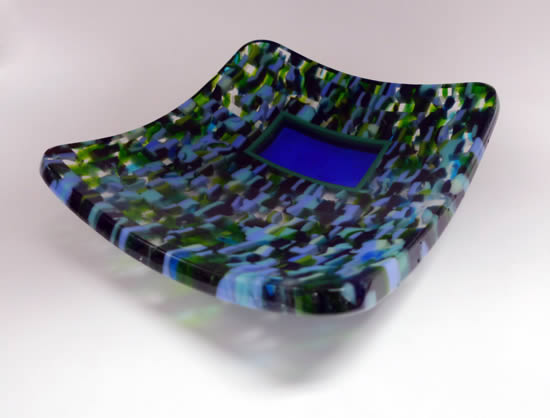
But despite that promise of near zero waste, over time we all still manage to collect buckets of fusible glass scraps. Perhaps one reason we are discouraged from using all those odd shaped bits and pieces is that scrap projects rarely manage to escape the appearance of something made from leftovers – an artistic afterthought.
That’s where this project tutorial – which uses only scrap fusible glass – is different. As you can see in the photo above, this scrap project doesn’t look like leftovers at all.
What You'll Need
Here’s what you’ll need to make your own similar bowl:
Supplies & Materials
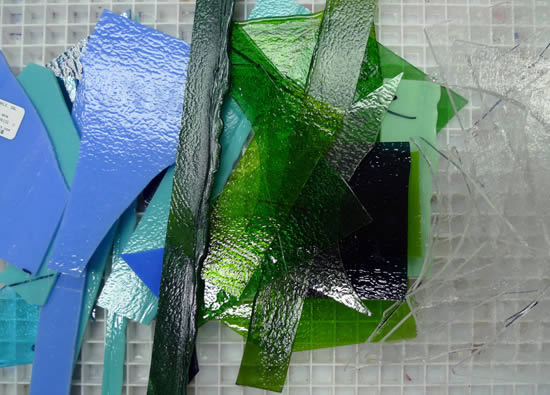
- 3.75 lbs scrap fusible glass. In this tutorial we used just blues, greens and clear as shown in photo below. You can use any glass you want, including transparent and opaque pieces.
- 4 dams, each 10 inches or longer.
- Fiber paper, about one and one half square feet, 1/32 inches thick (thicker is ok)
Tools and Equipment
- Glass cutter and/or mosaic nipper
- Tile saw
- Coldworking equipment to finish piece as desired (diamond pads work great)
That's it. We are ready to go!
The First Fusing
To prepare for the first fusing, break up the scrap glass into pieces that are no more than about 3 inches wide. As always with fused glass, clean the pieces well to avoid devitrification (surface crud) during fusing.
Place the fiber paper on the kiln shelf and arrange the dams to create a 10 inch square as shown in photo below.
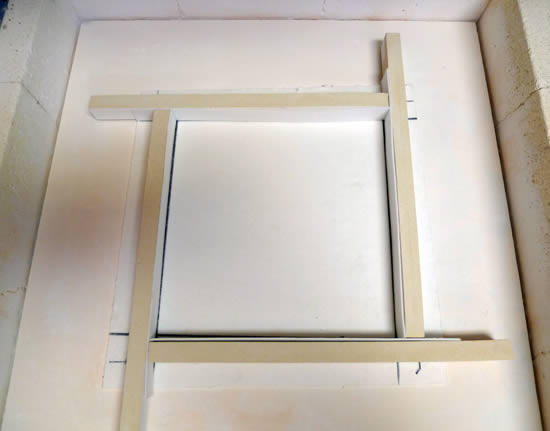
The fiber paper is important as it will allow air to escape as the glass melts together. Take note of the fiber strips that line the inward facing sides of the dams. These strips serve two purposes: They prevent the glass from sticking to the dams, and they serve as a gasket between dams so that the glass will not leak.
Now place the glass inside the dams as shown in this photo...
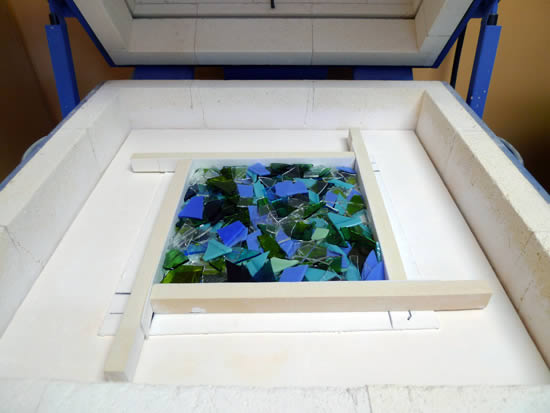
...and fire using this schedule:
| SEG | RAMP F/H | TARGET | HOLD | Notes |
| 1 | FULL | 800 | 30 min. | The kiln can heat at full speed since thermal shock is not a concern (everything is already in pieces!). The 30 minute hold allows the binders in the fiber paper to burn off completely before the glass starts to soften, reducing surface hazing. |
| 2 | 500 | 1225F | 2 hrs | This very long “bubble squeeze” allows the glass to soften and settle together, squeezing out much of the air that would otherwise be trapped as bubbles in the final piece. |
| 3 | FULL | 1500F | 30 min | This is the fusing segment where all the small pieces become a single, thick slab of glass. |
| 4 | FULL | 960F | 3 hrs | Anneal the glass very conservatively to minimize stress that might make it difficult to successfully saw the slab into strips later. |
| 5 | 50 | 800F | – | |
| 6 | 100 | 700F | – | |
| 7 | 300 | 100F | – | Final cooling to room temperature. |
Once complete, allow the glass to sit at room temperature for several hours before proceeding to the next step when you will cut it with your tile saw. This is important – solid glass is a terrific insulator and the core of a thick slab can remain hot long after the surface is cool to the touch.
Cut, Fuse, Repeat
You should now have a 10 inch square slab of glass that is about 3/8 inch thick. Being careful not to cut yourself on what may be sharp edges, take the slab to your tile saw and cut it into 3/8 inch wide strips. A cutting guide, as shown in the photo, will help you keep the strips all the same width.
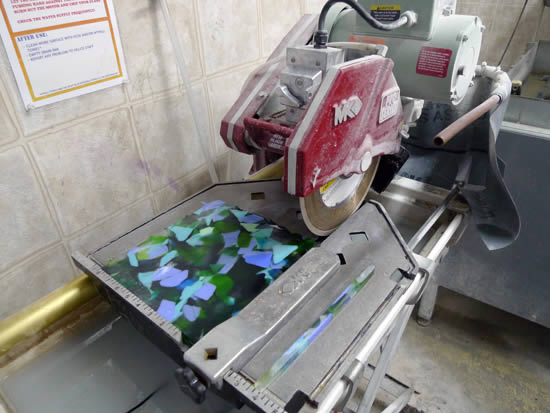
When cutting pieces this narrow, advance the glass slowly to minimize unwanted breaking. If the bars do break, don’t worry. Everything is going to be fused together again.
Clean the bars and lay them out on your work table. You should have something like what you see in this photo:
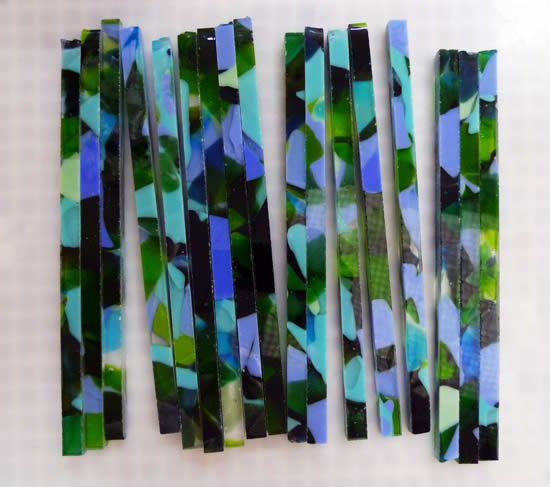
Take the bars to the kiln and re-dam so that they can be fused into a new slab. Make sure to mix up the order AND roll each bar one quarter turn so that a cut edge faces up:
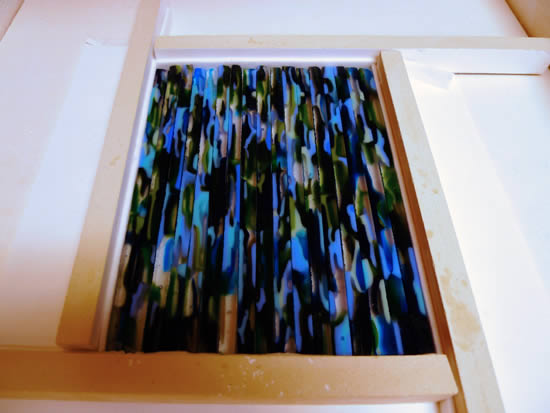
If any of the bars broke while cutting with the tile saw, simply place the pieces back together.
You’ve likely noticed that the slab is narrower than before. That’s because a little glass is lost with each saw cut. A typical tile saw blade is 1/16 inch, so there was slightly more than an inch of glass lost during this first pass at the saw.
Our schedule for this firing is similar to the one we used on the first firing:
| SEG | RAMP F/H | TARGET | HOLD | Notes |
| 1 | 500 | 800 | 30 min. | Our pieces are thicker than during the first firing so we will slow down our initial heating to avoid thermal shock. |
| 2 | 500 | 1225F | 30 min | We aren’t as concerned about bubbles this time – but letting the glass soften here will allow the heat to melt the glass more evenly during the next segment. |
| 3 | FULL | 1500F | 30 min | No change to these segments from the previous fusing. |
| 4 | FULL | 960F | 3 hrs | |
| 5 | 50 | 800F | – | |
| 6 | 100 | 700F | – | |
| 7 | 300 | 100F | – |
Already, the glass has lost much of the “scrappy” look:
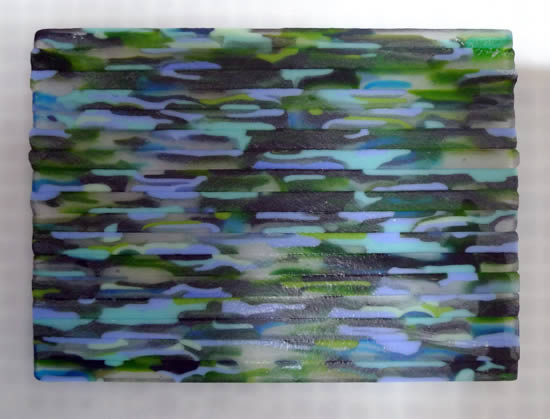
One more trip to the tile saw and then to kiln will complete the transformation.
Again you should cut 3/8 inch wide bars – but this time cut across the bars that we just fused together – like this:
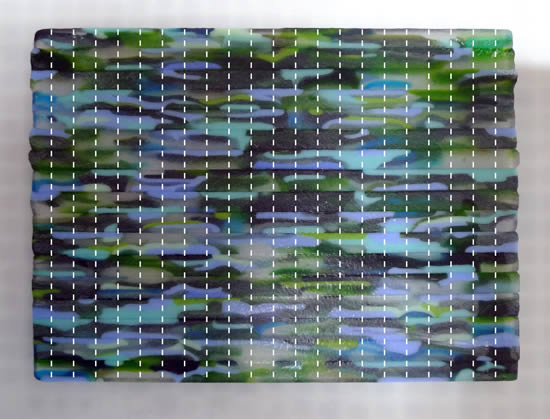
This trip to the tile saw results in this new, wonderful set of glass bars:
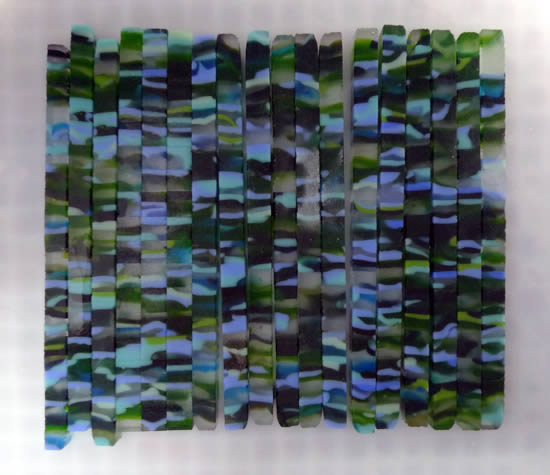
As you did with the first pass, we are going to re-arrange the bars and fuse them back into a slab. This time, though, we're going to add a window to make our piece more interesting.
Final Design Setup
As you did with the first pass, re-arrange the bars and fuse them back into a slab. This time, though, you can add some visual interest to the piece by including a small window. Here’s a photo of the work being assembled:
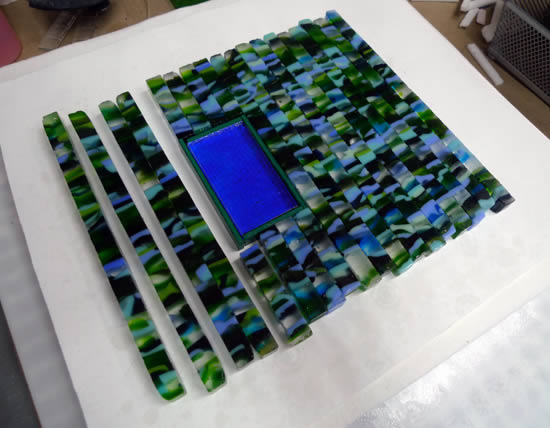
Since the bars are 3/8 inch tall, the window will need to be made from three standard 1/8 inch thick layers of glass to ensure everything is the same height. Also, note the green strips used to frame the window – this not only looks good, it will keep the design crisp when it fuses.
Here’s the final setup, ready to be dammed and fired:
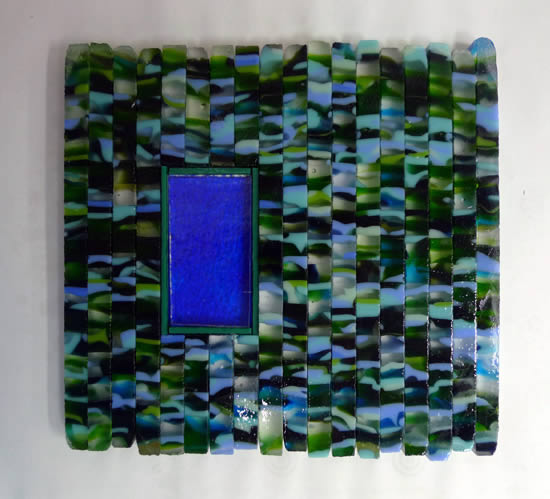
Fuse the glass using the same schedule in the previous firing.
Coldwork and Slump
With the bowl “blank” fired, the last steps are to clean it up and slump it. At this stage you have several options (which can be used in combination):
- Trim the edges with the tile saw to clean and straighten them.
- Cut or grind the corners to round them.
- Sandblast the surfaces to “scrub” them clean.
- Fire polish the piece to bring the front to a high gloss.
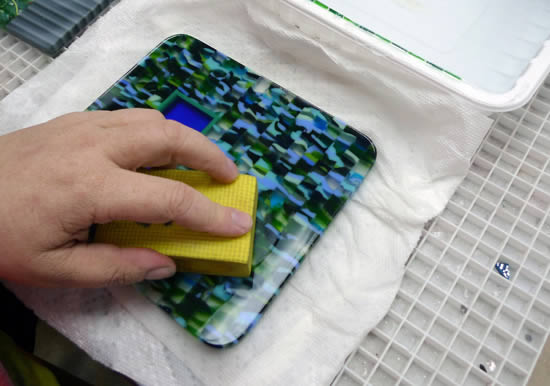
- Smooth the front and/or back with either a flat lapidary grinder or diamond hand pads (as shown here):
Place the piece on your chosen slumping mold, as shown in here:
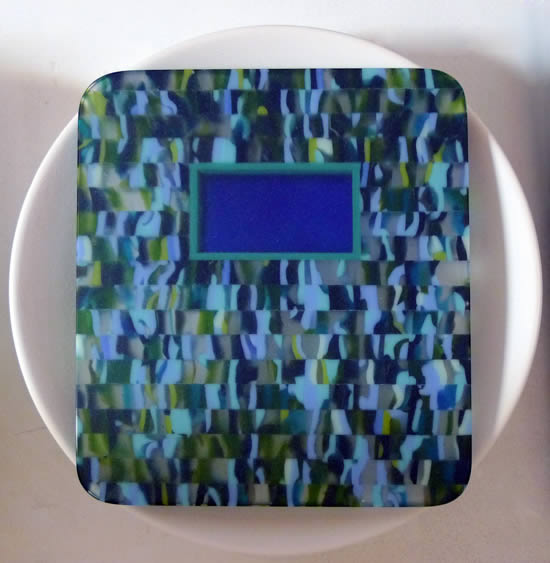
Slump with the following schedule:
| SEG | RAMP F/H | TARGET | HOLD | Notes |
| 1 | 200 | 1000F | – | If you have a shallow kiln, where the heating elements are less than 6 inches from the top of the glass, consider slowing this segment down to avoid thermal shock. |
| 2 | 100 | 1200F | – | A slow, steady ramp to 1200 will allow for even heating and, consequently, even slumping. |
| 3 | FULL | 960F | 2 hrs | Anneal soak |
| 4 | 100 | 700F | – | Anneal cooling |
| 5 | 300 | 100F | – | Final cooling |
That’s it - your bowl is complete! Don’t be surprised if you find yourself looking at your scrap fusible glass in a whole new way!